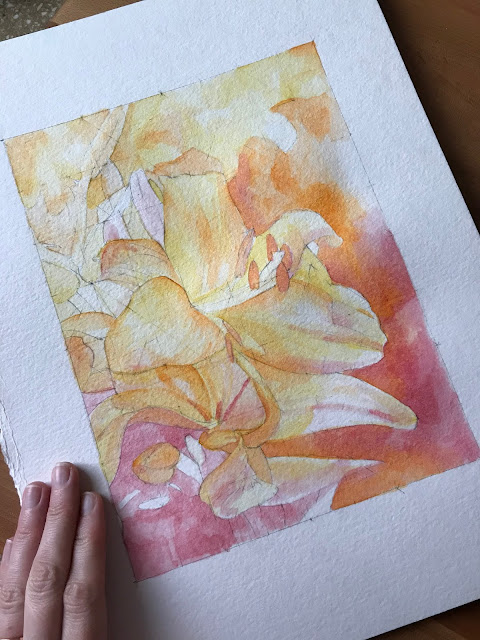
.
Here is the
link to the video that accompanies this blog post if you would like to see the
video version.
This summer was filled with so many watercolor painting lessons. I was so very excited to share with my students how to paint with watercolor. There are a variety of techniques that I do teach, but this one happens to be my favorite.
I learned it a few years ago in a book that described painting with watercolor in a similar way that I painted with oils, layer by layer. Instead of mixing the paint onto wet paper or in your palette, you paint with transparent colors, allowing each layer to fully dry before adding the next layer of color.
Here is one of the methods that I do teach to my students.
PROJECT - WATERCOLOR LILY
MATERIALS
1. Watercolor set, I prefer to use a Cotman watercolor set from Winsor and Newton
2. Paper Towel Roll
3. Ruler
4. Print-outs of flower, black and white and color copy
5. Sharpened colored pencil
6. Pencil and eraser
7. Watercolor paper, I prefer to use Arches Cold Press, 300 lb, 12 x 9 inches size
8. Blue Painters Tape
9. Masonite Board 11 x 14 inches
10. Soft watercolor brushes ranging from a size 0 and up
DIRECTIONS
1. Wet watercolor paper thoroughly under running water or in bath. Place paper on masonite board and tape edges. I prefer to measure a one inch border around my watercolor paper with a pencil before wetting it. I then add a long strip of tape along the sides for an even line and border when tape is removed. This is called "STRETCHING" the watercolor paper. Wait to dry completely before beginning the drawing.
2. If you do not have experience drawing, I teach a gridding technique to my students. If my reference photo is 8 x 10 inches, I measure 8 x 10 inches on my watercolor paper. Then I draw two diagonal lines to form an "X" in the center of the paper.
One half of 8 inches is 4 inches. Make a mark at the top and bottom at the 4 inches measurement of your 8 inches measurement lines. One half of 10 inches is 5 inches. Make marks at 5 inches on both of your 10 inch measurement sides. Continue adding horizontal and vertical lines to create a diamond patterned grid. For the watercolor paper copy, only use plain pencil. For the black and white photographic print-out, I like to used a colored pencil to help students see their lines easier.
Then you draw to match up the shapes in each triangle.
Time to erase my pencil lines...
3. Time to paint. Any area where you see a YELLOW-ish tone, paint CADMIUM YELLOW. Look at your reference photo for this step. It takes time to train your eyes to see from life. Realism is a challenge I never get tired of.
4. If you see any part of your reference photo that looks more orange or golden, paint it ORANGE. Do not be afraid to layer over the yellow parts. The yellow and orange combination looks luminous and sunny!
5. I use a CADMIUM RED for the you guessed it, RED areas. Any areas that appear to be more purple-ish, I also add red there. As you add different layers, allow time for each layer to fully dry. You can use small brushes to add detailed marks and larger brushes for more matte areas.
My watercolor teacher back in the day told me, "WATER IS YOUR FRIEND".
6. The next layer, I used a VERIDIAN GREEN. This color is rather potent, so use a little at a time. I really like the appearance of layering the green over the orange layers.
7. On to the next step. Paint all BLUE and PURPLE areas or cooler areas with ULTRAMARINE BLUE. This blue is very gentle, do not be surprised if you need to add multiple layers to get the desired effect.
8. Our final layer is BLACK or PAYNES GRAY, whichever you prefer. And there you have it, a beautiful watercolor of a painting of a lily to enjoy. If you see that there is a color lacking in your final painting versus your reference photo, now is the time to correct your errors.
Thank you so much for looking at this watercolor painting tutorial. If you are interested in more art teaching tutorials, I would be glad to help. Leave a comment below and tell me what you would like to learn.
God's Blessings on the rest of your day, and I look forward to teaching you more about art very soon,
Kelly


Comments
Post a Comment